Log Forwarding
smoxy can forward CDN access logs to an external log aggregation service in real time. This allows you to centralize your logs, build custom dashboards, and integrate with your existing monitoring infrastructure.
How Log Forwarding Works
Log forwarding is configured at the zone level, but it only produces logs for hostnames that have CDN enabled. This is an important distinction:
- A zone can have multiple hostnames assigned to it.
- Only hostnames with CDN functionality enabled generate access logs.
- Hostnames on the same zone that do not have CDN enabled will not appear in the forwarded logs.
- Each forwarded log entry is specific to the hostname that received the request.
Example:
| Hostname | CDN enabled | Logs forwarded |
|---|---|---|
www.example.com | Yes | Yes |
api.example.com | Yes | Yes |
staging.example.com | No | No |
Even though all three hostnames share the same zone configuration, only www.example.com and api.example.com will produce forwarded log entries.
Prerequisites
- A zone with at least one hostname that has CDN enabled
- A log receiver (syslog-compatible endpoint, or Datadog)
Configuration
Log forwarding is configured per zone in the Proxy page.
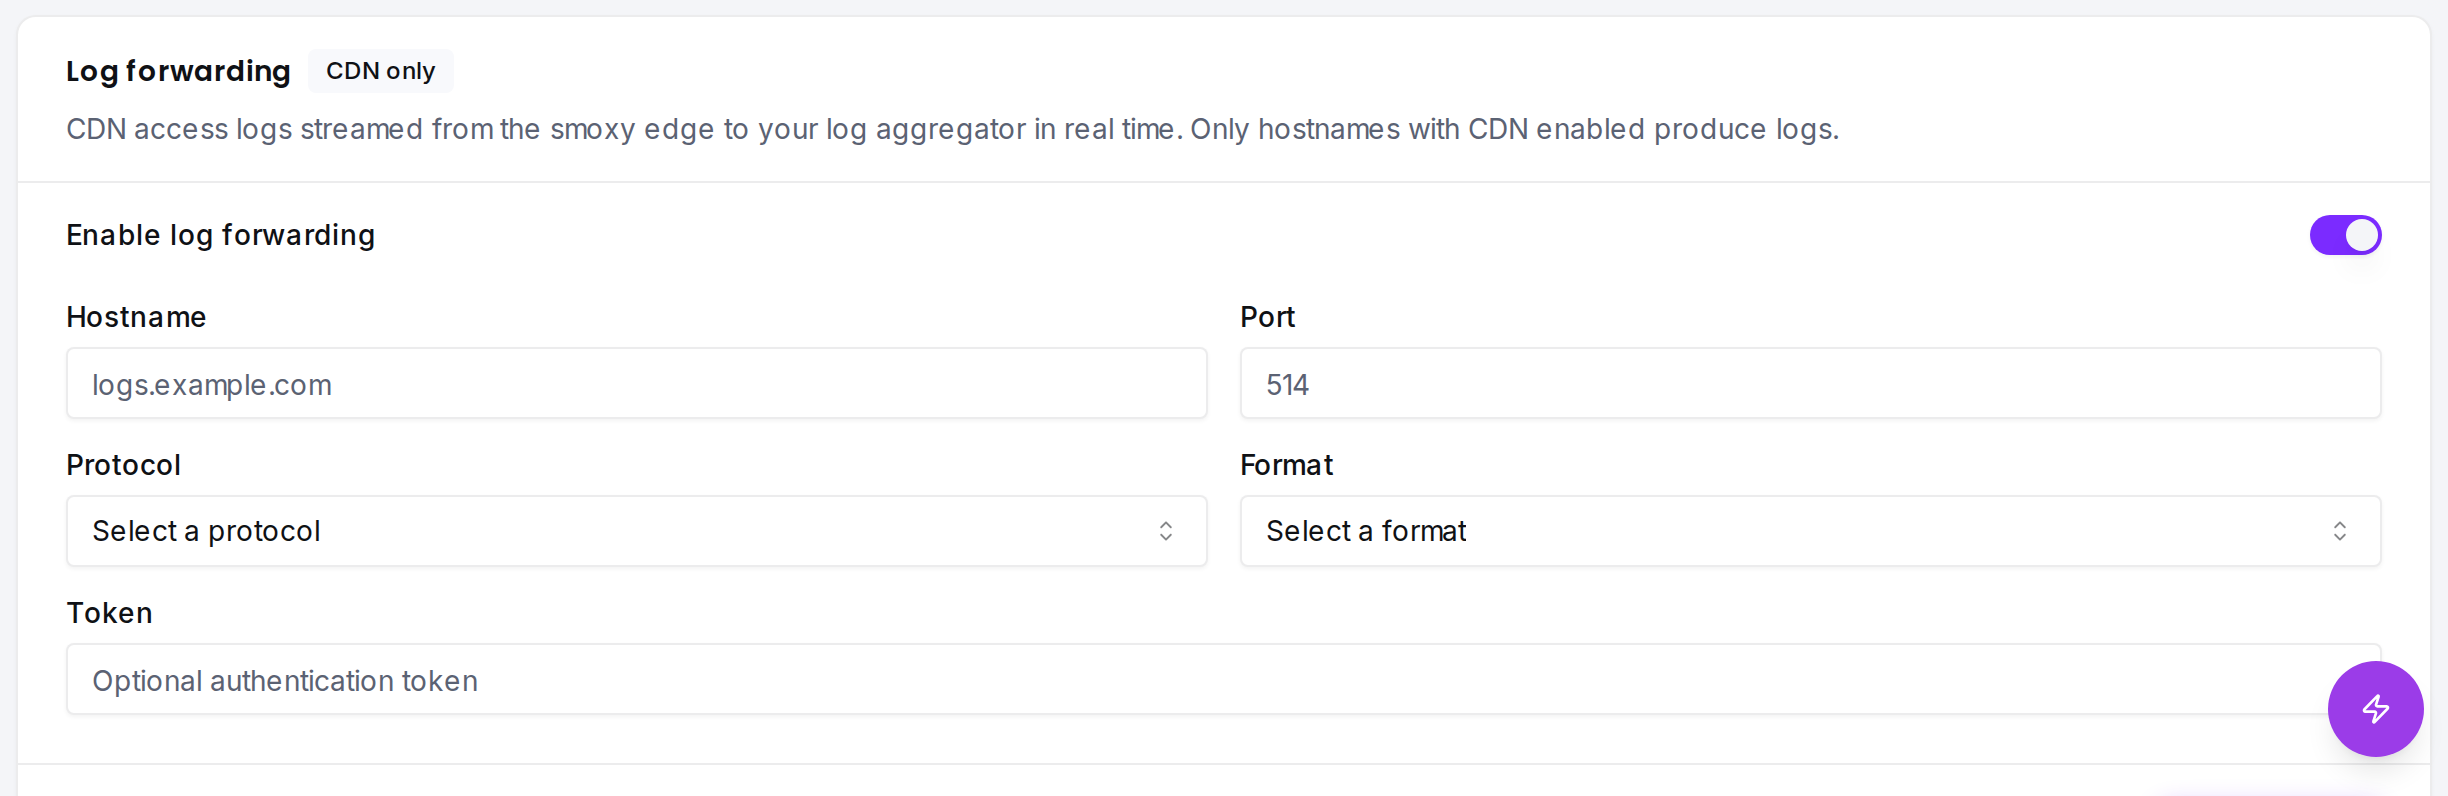
Settings
| Setting | Required | Type | Description |
|---|---|---|---|
| Enable Log Forwarding | -- | Boolean | Turns log forwarding on or off |
| Hostname | Yes (when enabled) | String | The hostname or IP address of your log receiver (max 255 characters) |
| Port | Yes (when enabled) | Integer (1--65535) | The port your log receiver listens on |
| Token | No | String | Optional authentication token sent with each log entry (max 255 characters) |
| Protocol | Yes (when enabled) | Choice | Transport protocol (see below) |
| Format | Yes (when enabled) | Choice | Log output format (see below) |
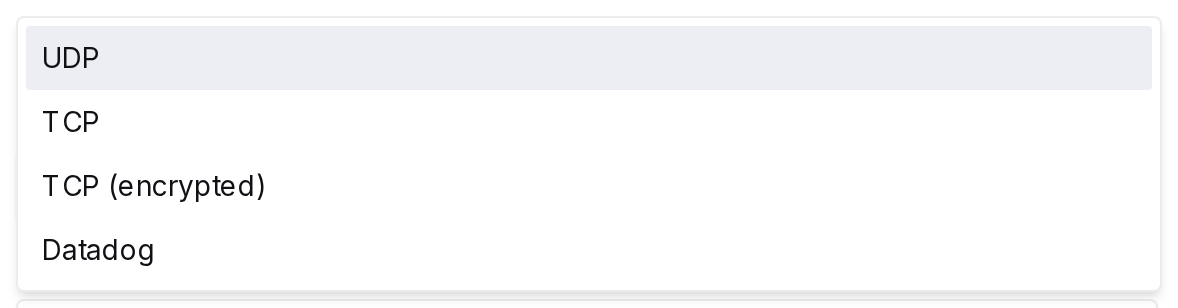
Protocols
| Protocol | Description | Use case |
|---|---|---|
| UDP | Unencrypted, connectionless | Fastest option, suitable for local/trusted networks |
| TCP | Unencrypted, connection-based | Reliable delivery over trusted networks |
| TCP (encrypted) | TLS-encrypted TCP | Recommended for sending logs over the internet |
| Datadog | Datadog-native protocol | Direct integration with Datadog log management |
Formats
| Format | Description |
|---|---|
| JSON | Structured JSON log entries -- recommended for most log aggregation tools |
| Plain | Plain text log entries -- useful for simple syslog setups |
Setup Guide
Step 1: Prepare Your Log Receiver
Set up a log receiver that can accept incoming logs. Common options:
Grafana Loki with Promtail/Syslog:
- Configure a syslog listener on a known port
- Use TCP or TCP (encrypted) for reliable delivery
Elastic Stack (ELK):
- Configure Logstash with a TCP or UDP input
- Use JSON format for structured parsing
Datadog:
- Use the Datadog protocol option
- Configure your Datadog API key as the Token
Generic Syslog:
- Any syslog-compatible receiver works
- Use UDP for simplicity or TCP/TCP (encrypted) for reliability
Step 2: Ensure CDN Is Enabled
Log forwarding only works for hostnames with CDN enabled. Verify that the hostnames you want logs for have CDN active:
- Navigate to your Zone in smoxy
- Check the hostname list -- hostnames with CDN enabled will be indicated
- If CDN is not enabled for a hostname, enable it first
Step 3: Configure Log Forwarding
- Navigate to your Zone in smoxy
- Open the Proxy page
- Scroll to the Log Forwarding section
- Toggle Enable Log Forwarding on
- Enter your log receiver details:
- Hostname: e.g.,
logs.yourcompany.com - Port: e.g.,
514(syslog default) or your custom port - Protocol: Choose based on your setup
- Format:
JSON(recommended) orPlain - Token: Optional authentication token if your receiver requires one
- Hostname: e.g.,
- Save the configuration
Step 4: Verify
After enabling, check your log receiver for incoming log entries from smoxy. Log entries should appear within minutes as your CDN-enabled hostnames receive traffic.
If you don't see any logs, verify that:
- The hostnames receiving traffic have CDN enabled
- Your log receiver is reachable from the internet on the configured port
- The protocol and format match your receiver's configuration
Disabling Log Forwarding
To stop forwarding logs:
- Navigate to your zone's Proxy
- Toggle Enable Log Forwarding off
- Save
Important Considerations
- CDN required: Only hostnames with CDN enabled produce forwarded logs. Hostnames without CDN on the same zone are not included.
- Per-hostname logs: Each log entry belongs to the specific CDN-enabled hostname that handled the request, not the zone as a whole.
- Zone-level configuration: The log forwarding settings (receiver, protocol, format) are configured once per zone and apply to all CDN-enabled hostnames on that zone. You cannot configure different log destinations for individual hostnames.
- No buffering: If your receiver goes offline, logs during the outage are not queued or retried.
- Use TCP (encrypted) when forwarding logs over the internet to protect log data in transit.
- Use JSON format for easier parsing and filtering in log aggregation tools.
- The Token field is useful for authenticating with services like Datadog or custom log receivers that require an API key.